2023-07-04 03:52 | [practical-power-cycling]
previous: The Toaster Challenge - next: Arduino Watt meter
This is part of my bicycle generator project originally posted on hackaday.io
The next part of the project is about the power supplies, which convert whatever I've got in the capacitor bank to the correct voltage for whatever device we want to power.
Technically, you can get by without one, at least for DC devices, just keep an eye on the capacitor voltage and be careful not to let your speed get higher than the voltage you want. However, especially after the new chain retrofit, 12V, for example, is now too slow to pedal. Though it is true that it is the same energy rate, it is a far more comfortable experience to pedal at 30 or 40 volts and drop down to your target 12V using a buck regulator.
50V, the maximum to which the capacitor bank can be charged, is also too low for a 120V device, even those that run well on DC. One way I could solve this is by buying more capacitors, then doubling the teeth on the jackshaft sprocket, which would spin the generator twice as fast and get into the 100-120V range easily. However, you'd still have to make some AC from that for some devices, and it now becomes more complicated to drop down again for low voltage DC devices. It seems 30-50V is a pretty good "middle ground" voltage from which you can go either up or down.
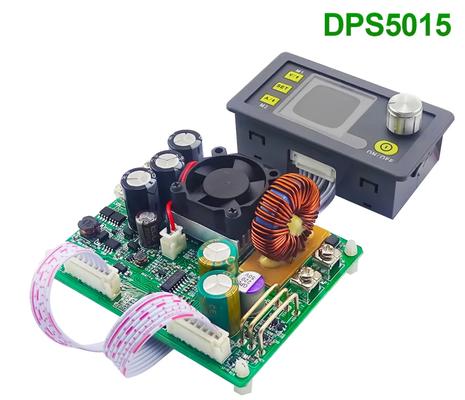
Let's start with the down part first. It's nothing special; buck regulators can be had any day of the week from the usual suppliers. I started out with a standard DPS5005, which is a small panel-mountable buck converter with a nice little screen and interface to set voltage and current limits. These are apparently a decent target for alternate firmwares which introduce better feature sets, but I have not had a need to try one out yet. Instead, after experiencing some dropout problems from the 5005 not being up to the task of handling power draw spikes from my laptop, I upgraded to the 15 amp version, the DPS5015.

This version maintains the panel-mount UI section, but the electronics are on an external board. Both devices are rated for 50V, or at least that's what it says on the box. I probably wouldn't use one of these in place of a lab bench supply, but if you just want to charge your phone, or maybe a battery, it's fine. That's got us the low voltage DC side covered, you can connect up whatever connector you need to the output terminals, set the voltage - maybe a current limit if you're feeling cautious, and you're off.
While we're here, I might as well talk about the laptop that I regularly power. It's a ThinkPad W530, also found in the trash. This was a pretty powerful laptop when it released in 2012, but over 10 years later it is still good enough to run Linux and browse the modern internet, and watch videos. As a powerful laptop, it had a high power adapter brick to go with it, which I didn't have, nor did I have any other Lenovo brick available. As it turns out, this uses what is known as a "slim tip" connector, which is sort of like a flat version of a normal barrel connector. It has contacts on the inside and outside surfaces which supply 20V; that pin in the middle is just so the laptop can tell what wattage of adapter is connected. Luckily, that's not some kind of anti-repair secret protocol, it's just a resistor between the middle pin and GND, 1K for a 135W charger. I decided to dispense with all of that, and, noticing that the connector was the approximate size of an XT30 connector, I replaced the whole connector with that (apologies - I seem to have lost the CAD for the mount I made for it).
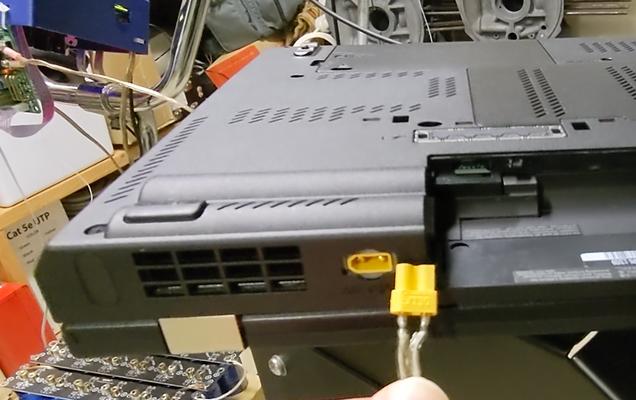
Of course, the battery no longer held a charge either; about 40 minutes to an hour was all I could get out of it. I don't believe this laptop was particularly known for good battery life back in the day either. I used it with the battery for a while, until one day I dropped the battery on the ground and it broke (dumb). However, this was truly no major loss, and better aligns with my goal of "fully human powered", so I continued operating without the battery, powering directly through the charge port. Two things about this surprised me: that the laptop only required about 20-30 watts (which is easy enough to power without even thinking about it), and that that laptop would now operate way down at 12 volts, far below the 20V that the original brick used.
Something to consider is that deep down, all laptops are really 12V, because they all use 11.4V lithium ion batteries. Sometimes, you can even power them with a 12V source right off the battery terminals, with the battery removed, provided you can find the correct polarity. If you can't get it through the battery terminals, you can work your way through the power supply section until you find a spot to apply power. Arya Voronova's hackaday series is a good introduction to just what you can do with laptop motherboards. In my case, I just got lucky, and with no battery to charge, the rest of the laptop's circuitry was able to run off the reduced voltage.

And now for the other half of the equation - powering 120V devices. Originally, I had nothing, until I scraped together a 50V to 12V converter, followed by a car inverter. If that sounds efficient, you should get your thermodynamics checked - it was not. In fact, you could barely power a 40 watt incandescent, and had no chance at powering a power brick for my regular laptop (not the one above).
I was on the lookout for the sort of stuff the solar panel people use, although my own requirements were for far less power than those typically run. However, the same trash can blessed me with an upgrade once again. This time, it was a computer UPS. Now, I know that even you yourself have probably dug 10s of UPSs out of the trash over the years, but this one was special - it was somewhat better construction than the usual suspects, and seemed to be HP enterprise gear - a step up from the flat "power strip" kind you probably have under your desk at the office.
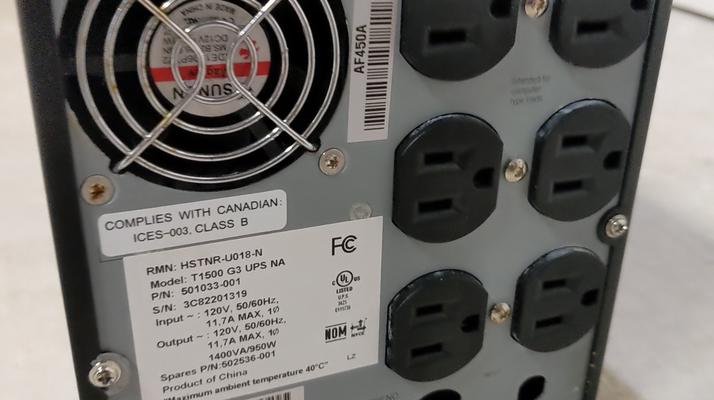
However, other than the claimed capacity of 1500 watts, I didn't find much useful information in the online manuals; this is clearly not from the same HP that once made the world's finest test equipment, not even the battery voltage was listed. The breakthrough came when I managed to find a listing for replacement batteries from a third party, which seemed to come as a set of 3 batteries. That seemed to suggest that this was a 36V unit, in the form of 3x 12V sealed lead acid cells.
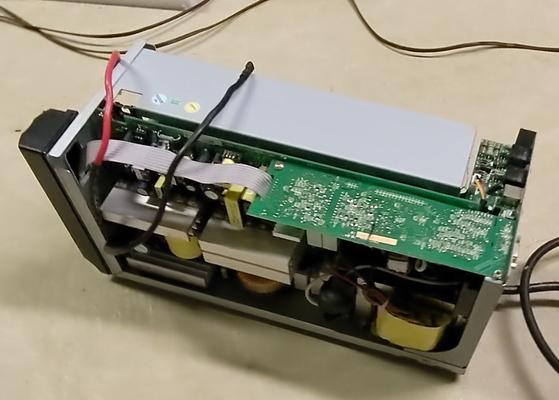
The inside of the unit seemed to contain a lot of high quality components as well. I took the opportunity at this point to remove the power cord, since it was no longer needed. To the original battery connectors, I added an XT60 connector. I also added a smaller connector to the power on button - this unit had no problem being started on the "battery," so long as you held the power button in for a full second. That way, I could run the power button up to the bicycle handlebars, and power on and off the inverter as needed without needing to stop pedaling.
This particular trash find exceeded my expectations in 2 ways. First, I found that it had no problem working at 50V, all the way at full capacitor voltage. I suppose that when designing these sorts of things it isn't unreadable to over spec your components, but I was surprised that there was no over voltage lockout in this thing. There most certainly was low voltage lockout, and the unit would power off, and could not be started again, at 32V or lower.
I also found that the usual "on battery" alarm that sounds every few seconds on a normal UPS, could be disabled by pressing the included mute button. If I held the button in, that alarm would be silenced, but it would still allow the low voltage alarm to sound, providing some advance warning that it was time to recharge the capacitors. So, I simply soldered it closed.
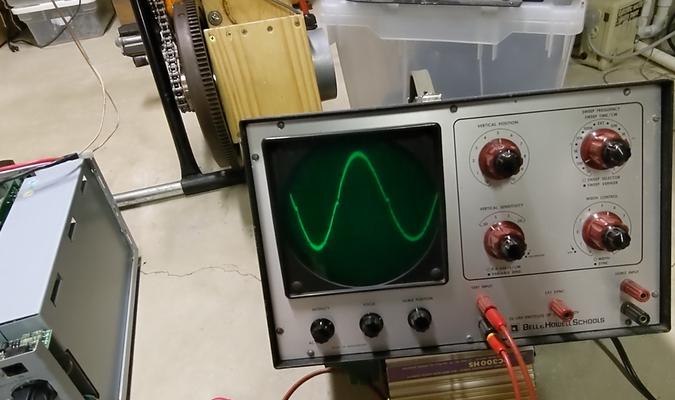
Second, it turned out to be a pure sine wave unit! It is easily able to power a small floor fan that I use to keep myself cool when operating the bike. For peak power, I found it could power 500W no problem, but 900W was too much; It could not power a normal toaster. That's beside the fact that I'd never be able to keep up with that sort of consumption in the first place. The rating is for 1500W, but I think I am experiencing some voltage drop in the wires I use to connect to the capacitors, or the capacitors themselves a much higher ESR that I expected. In any case, for my use case, it was fine, and surely overkill.